![]()
![]()
![]()
|
|
|
|
administrator or as another user with equivalent permissions.In a distributed configuration, stop Traverse components on the DGE hosts, and then on the server where the BVE/Provisioning Database is operating. In this environment, always make sure you upgrade the system running the BVE/Provisioning Database first.
C:\OLD-traverse-5.x).<TRAVERSE_HOME> into the directory you just created.Components Running Prompt: Windows Upgrade
During the installation/upgrade, you might see a message, indicating that the installer cannot access some files in the Traverse directory because they are being used by the WMI service.
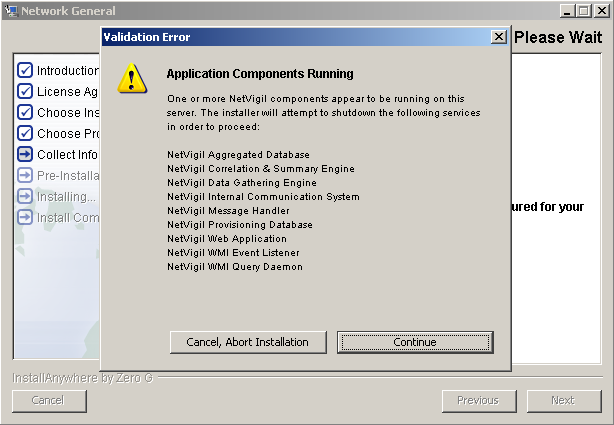
To resolve this issue and continue the installation, open a command window and enter the following, and then click Continue:
net stop winmgmt
The installer might prompt you to stop other dependent services. If so, stop these services.
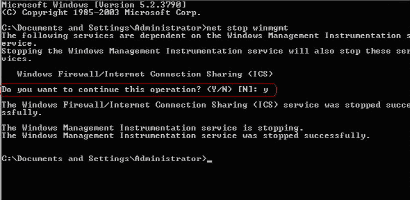
After the confirmation prompt displays, continue the installation/upgrade.
Note: Prior to migrating existing configuration and historical data, the installer displays a confirmation prompt.
Review Configuration Files
<TRAVERSE_HOME>\OLD-traverse-5.x directory. If you made any modifications to the configuration files, such as adding a new JDBC driver or configuring plug-in authentication, you must manually re-apply the changes. The analysis/migration process can take a large amount of time. The duration of the conversion process depends on the hardware specifications of the DGE system. For example, converting data for 15000 tests with historical data for six months:
1 x 3.4GHz Pentium 4; 1GBRAM; SATA drives = 3 hours