With the 9.5.9 version, VSA introduces the new version of the Software Management module — 2.0.
Note: K3PP Software Catalog menu item is renamed to 3rd-Party Software 2.0.
Advantages:
Limitations:
Migration
Scan and Analysis profiles migration
Scan and Analysis profiles defines an "OS Patches Engine" and therefore need to be updated to support the new module version.
During next scheduled scan procedure VSA will use new version of the module to do the scan. Your override profiles will continue to analyze newly discovered patches.
Note: Virus removal patches are not supported ìn the new version
3rd-Party Software profiles migration (manual)
Click 3rd-Party Software 2.0. Create a profile.
Specify a set of applications to be installed and updated. Use the auto update option to automatically approve new software versions.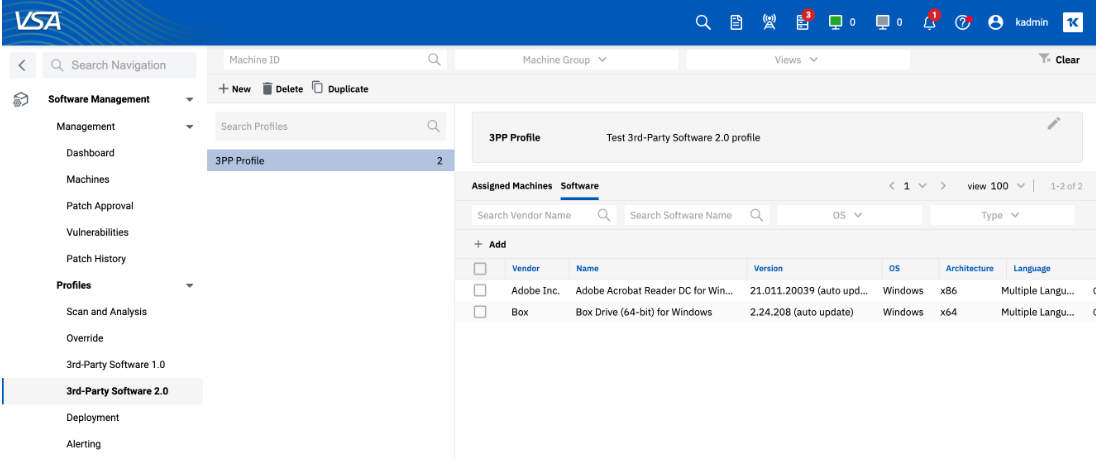
Assign a new profile to the list of machines
Navigate to Machines.
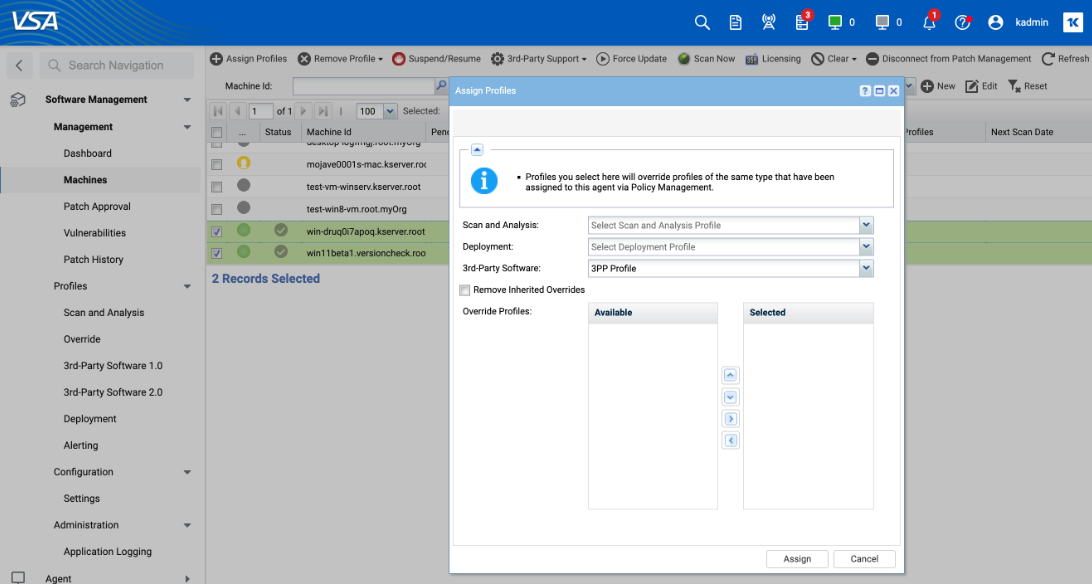
Reassign 3rd Party Software 2.0 profile to a list of machine.
Use the «Assign Profiles» button and select a new 3rd-Party Software 2.0 profile in the «3rd-Party Software» field. Be attentive to include the same list of machines.
3rd-Party Software profiles migration (automated)
We have created a migration interface to automatically create new profiles and reassign machines.
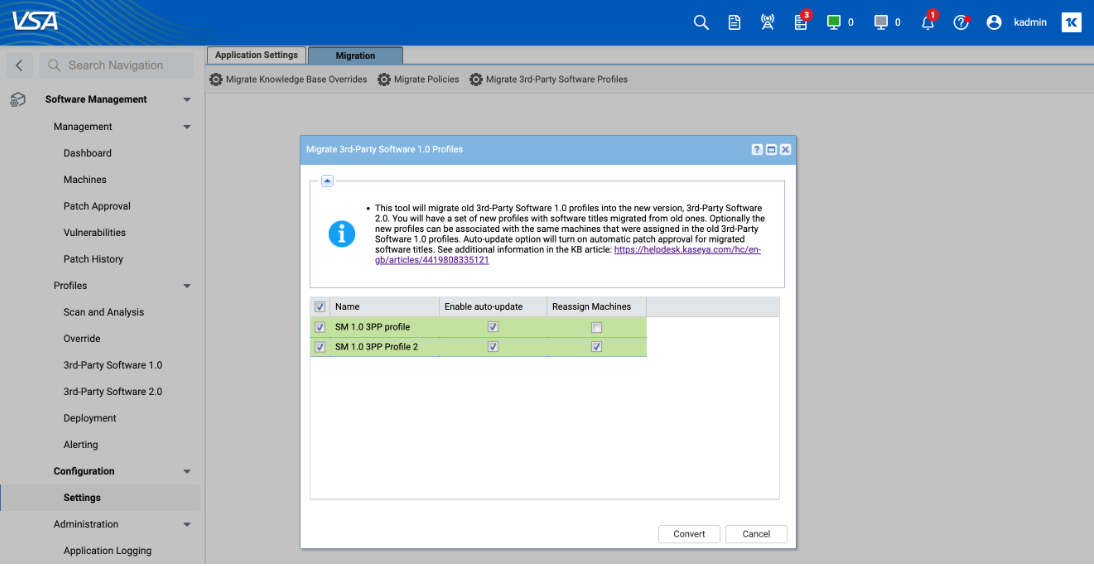
Open migration dialog.
Open «Configuration» -> «Settings» page and open the «Migration» tab. Click on the «Migrate 3rd-Party Software Profiles» button.
Choose profiles to be migrated.
Check old profiles you would like to be migrated. Check «Enable «auto update» to automatically approve new software versions. Check «Reassign machines» to automatically reassign machines to the migrated profile.
Software Management > Profiles > 3rd-Party Software 2.0 > Select Profile > Click Software > Click Add > The Add Software dialog box is displayed. The auto update column is displayed under Added Software. This will help to start the auto update functionality.
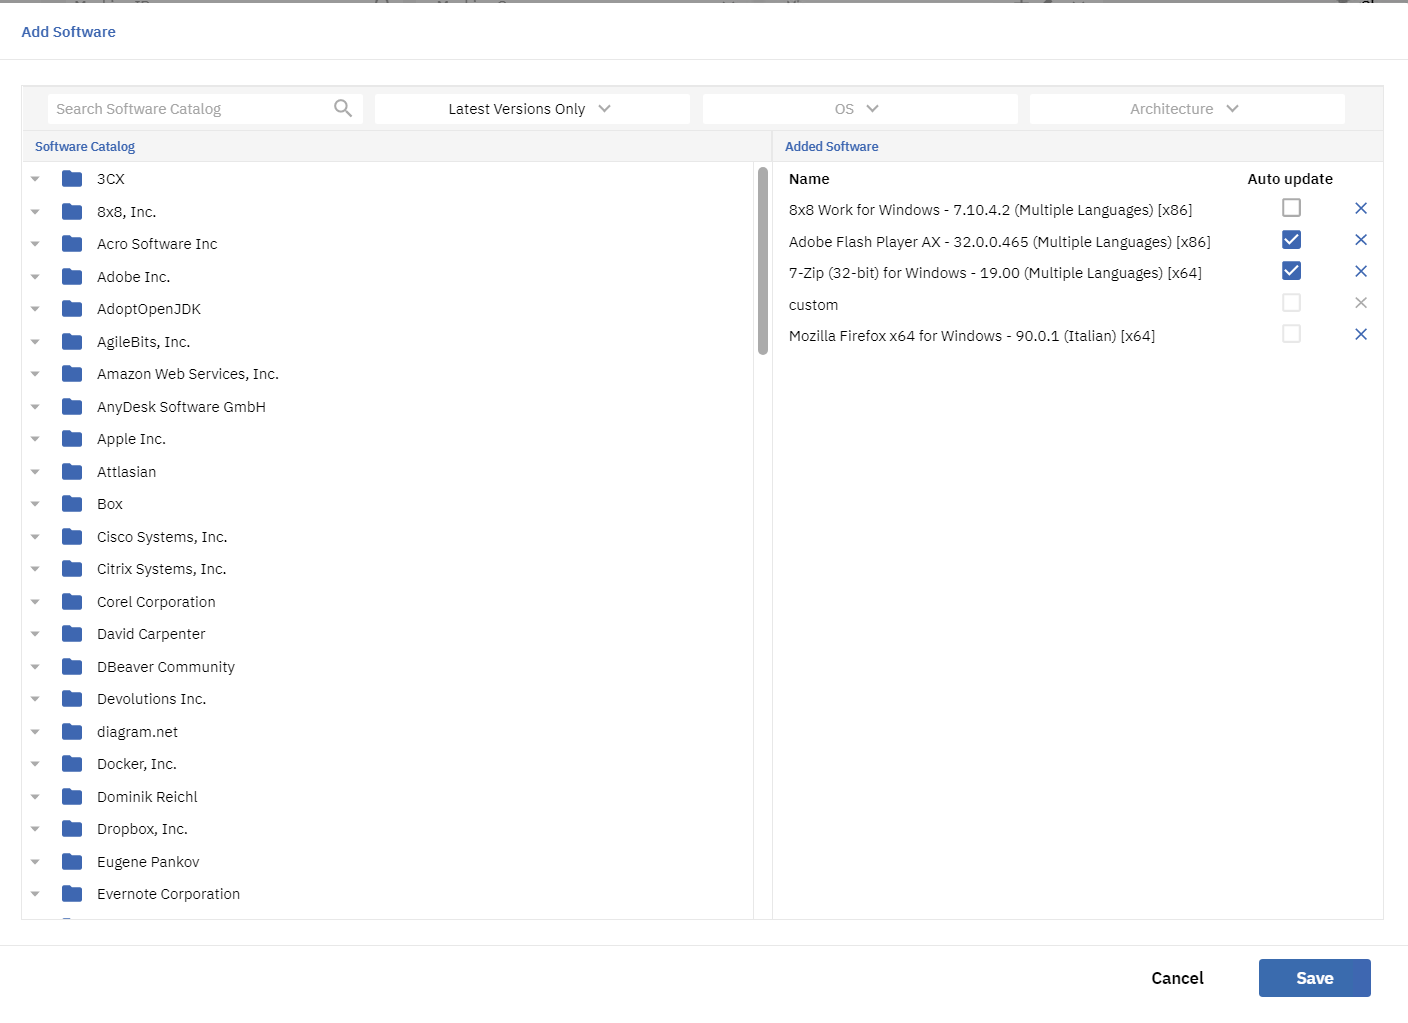
The checkbox is checked when adding latest version.
The checkbox is disabled when the latest version is not added.
The checkbox is disabled when custom installer is added.
The auto-updated applications show this flag in the «Version» column:
<Version_Number> (auto update)
For example: «7.10.4.2 (auto update)»
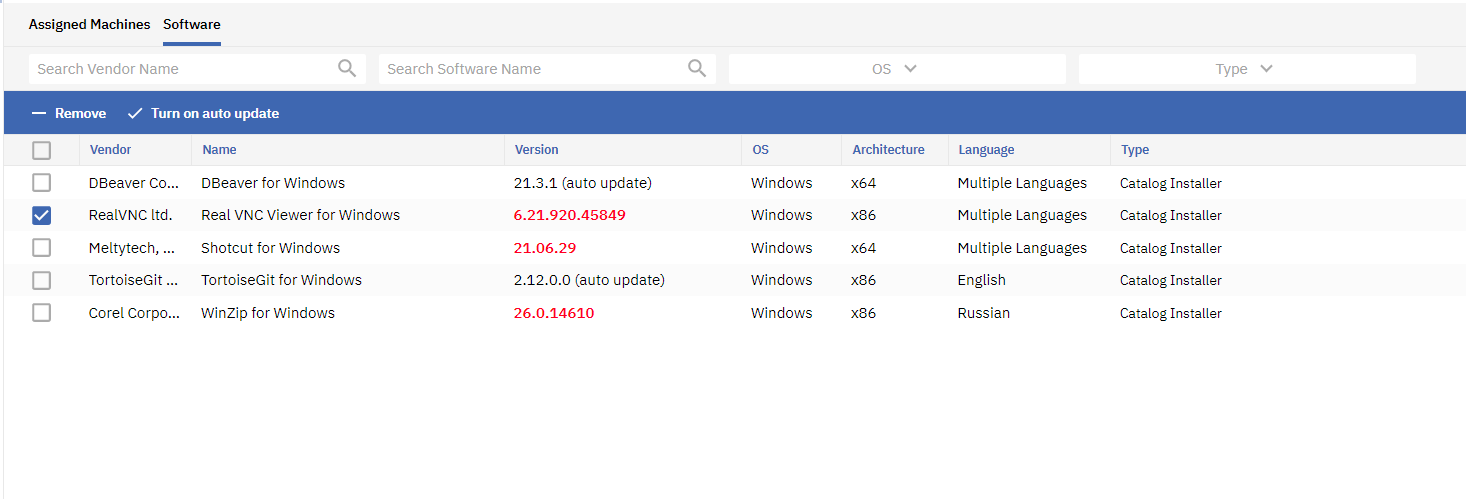
When applications selected in the grid display actions:
«Turn on auto update» + icon, or
«Turn off auto update» + icon
When clicked «Turn off auto update» show confirmation dialog: «Are you sure to turn auto update off? The specified version will be installed during deployment.» + buttons «Cancel», «Confirm».
For applications with auto update turned off «Update» action will not be displayed in the Version cell.