![]()
![]()
![]()
|
|
|
|
Since a monitor always exists inside an object, first locate the relevant object where you wish to create the monitor. Then open the object information view for that object, and click the New monitor command in the monitor section. Network Monitor displays the new monitor page.
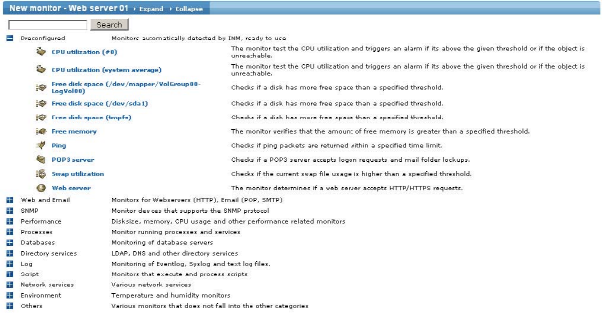
The new monitor page
The new monitor page is organized into categories of monitors, with the Preconfigured category on top. You can expand and collapse individual categories by clicking the + and -icons in the tree. The system type of the object dictates what types and categories are available.
Preconfigured monitors
This category contains monitors that Network Monitor have automatically configured for the object. When you click the monitor name it is immediately added to the object and removed from the Preconfigured category.
No monitors in the preconfigured category?
The most common reasons why no monitors, or unexpected, monitors are displayed in the Preconfigured category are:
Searching for monitors
The Search field helps you find a specific monitor type. Enter a keyword and press the search button. To clear the search you have to clear the field and click the Search button again.
Creating the monitor
When you have found the desired monitor, click the monitor name and the monitor property page displays to do initial configuration of the monitor. For information about editing monitor properties see the Editing a single monitor section.