In Traverse you can launch VSA Live Connect from any device that has a VSA agent installed on it, if Traverse is integrated with a VSA. The Live Connect app is a single-machine user interface that runs natively on your local machine, independent of the browser you are using to log into the VSA. Use it to immediately access and manage remote computers using a set of status and configuration tools.
Live Connect menu options include:
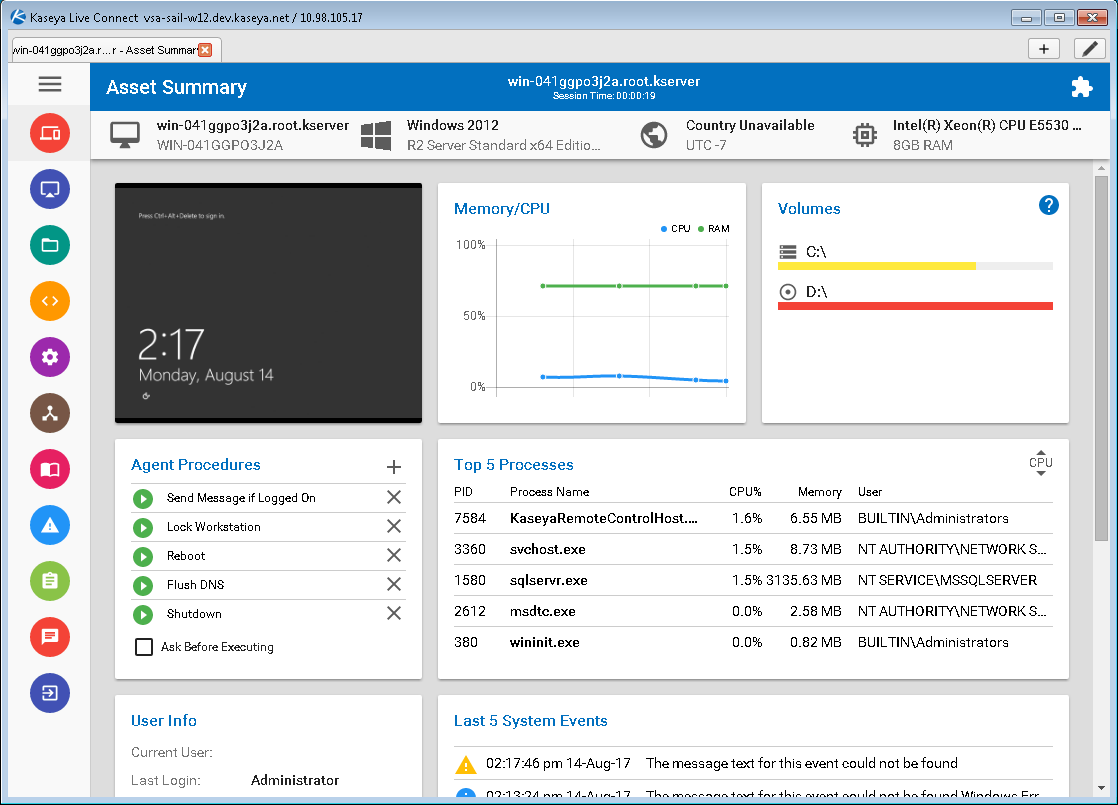
Asset Summary - Shows the status of all major components on the computer.
Remote Control - Starts a shared or private remote desktop session.
File Management - Upload or download files.
Command - Open a command window and run commands.
Services - Start, stop, restart services.
Processes - Lists or stop a running processes.
Registry - Create, rename, refresh or delete keys and values, and set the data for values.
Event Viewer - Displays event data stored on the managed machine by event log type.
Ticketing - Displays and creates tickets managed by the VSA for the managed machine.
The latest version of the Kaseya Live Connect app from VSA v9.5.
Allow popups for all sites on the browser you are using during configuration.
Configuration
In the VSA
Select the VSA > System > OAuth Clients page.
Create a new OAuth client record for your Traverse tenant.
See the VSA > System > OAuth Clients help topic for details.
Provide a Redirect URL. The format should be: https://<traverse-domain-name>/OAuth/KaseyaVSACallback.html
Provide an email address to receive a Client ID and Client Secret email.
Open the email that contains your Client ID and Client Secret.
In Traverse
Log on to Traverse as a superuser.
Navigate to the Superuser > Global Config > Web Application page.
Check the Enable integration with Kaseya VSA checkbox.
Enter data in the following fields:
VSA Server URL - The URL of the VSA you are integrating with Traverse. The format of the URL is: https://<VSA-domain-name>
Login Username - The username of the VSA user used to authenticate API ticket creation requests in the VSA.
Password - The password of the VSA user.
Repeat Password - Reenter the password of the VSA user.
Click Test Connection to validate the credential you entered.
Check the Live Connect/Remote Control checkbox.
Paste the Client ID and Client Secret from your VSA email into these fields.
Click Save to save your changes.
Wait a few minutes for Traverse to run agent discovery and map VSA agents to Traverse devices.
Agent discovery runs every hour after this. If new agents are added to the VSA that match devices in Traverse, they are detected within an hour.
Launching Live Connect in Traverse
If Traverse is integrated with a VSA:
Look for the lightning bolt icon next to the name of a device on selected pages. You'll see this icon on the Status > Devices page, the Administation > Devices page and in Panorama views.
Display the options list for that device, typically by clicking the options icon.
Click the Live Connect option.
If Live Connect is not installed on the machine you are using, a message box displays asking you to download and install it.
If your Traverse user has not yet authenticated access to the VSA, clicking the Live Connect option displays the VSA logon page. Enter VSA user credentials. This binds your Traverse user logon to the VSA user logon.
From then on launching Live Connect for any device in Traverse immediately displays the Live Connect window for that device, using the bound credentials you provided.
The agents you are able to list in Live Connect depends on the scope assigned to the VSA user logon you authenticate with. If you don't have rights to view a particular agent, launching Live Connect will redirect you to a list of agents you are authorized to see.
If you ever wish to bind different VSA credentials to your Traverse user logon, enter the following in your browser: https://<traverse-domain-name>/OAuth/KaseyaVSACallback.html. Then click the Revoke option. The next time this Traverse user logon is used to launch Live Connect, the VSA logon page will display again and you can enter in different credentials.