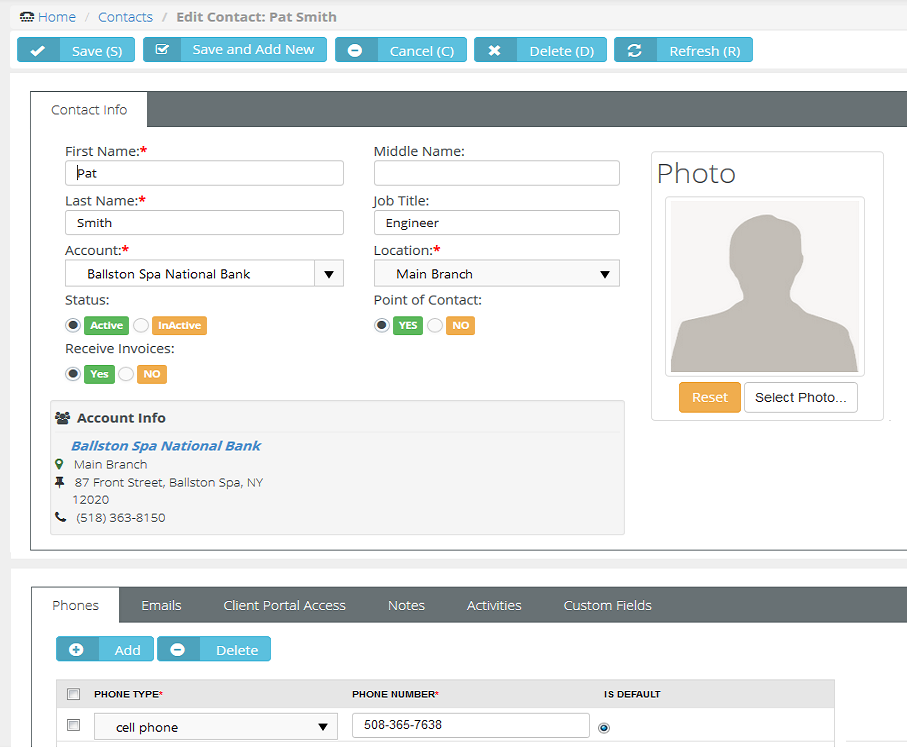
Use the Contacts tab to maintain contacts for each account. These are the individuals that the sales team work with to sell products and services. These are the people that your project team is delivering a completed project to. These are the people that are calling you for support and who you are opening tickets for.
Adding New Account Contacts
Active or InactiveYes, this person will be notified if a workflow rule is configured to send notifications to Point of Contact.Yes or NoReset or Select Photo
If you are using the Service Desk module, you can turn on Client Portal for all contacts in your accounts that are clients. The client portal is a secure place for your customers to submit and track help tickets. There is also a Message center that allows the user to send messages directly to their service provider, making it easier to follow up with any tickets and questions that may not be support related. Security roles are provided that makes it easy to turn on the portal and give the right permission levels to your clients.
Yes, the client has portal access and two extra fields Username and Security Role display. The first time this setting is saved, the contact is sent an email with a user name, password and instructions on how to login to the portal.Client AccessExternal User - Allow the client to view/edit their own profile and messages, as well as tickets assigned to them. External Manager - Allow the client to view/edit their own profile and messages. However, unlike 'External User' this option will allow the client to view all tickets.Activities are a history of the interactions between your company and the contacts for an account. Many activities may need to be tracked to support converting an opportunity into a sale.
Appointment, Ask for Sale, Call, Demo, Email, Follow up, Inquiry, Marketing, Memo, Proactive Call, Quote, Renew Agreement, Task