Creating custom NOC views
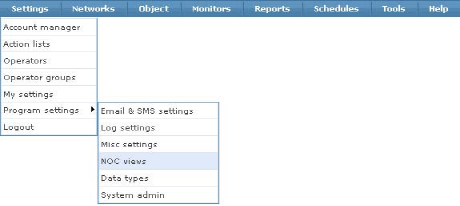
To create a custom NOC view, open the NOC settings page. This page is found in the Settings menu and in the Program settings submenu. The NOC settings page displays.

Opening the NOC view settings
NOC settings
In the first section, there is a global setting that affects all NOC views.
- NOC view mode - This option affects all NOC views, and specifies whether or not to include monitor types not in the Network Monitor system configuration when viewing a NOC view.

The NOC settings page
Adding a new NOC view
To create a new NOC view, click the New button. The NOC settings page displays.
- View title - Enter the title of the NOC view. This should reflect the contents of the NOC view, for example,
Web serversor similar. - Group by - Choose the level of detail to display in the NOC view. Depending on the Group by setting, the NOC view is added to the Network Monitor menu in either the Networks or the Objects menu.
Group by networks- This displays networks only.Group by objects- This displays objects in the view.Group by objects, then monitors- This option displays objects, then the underlying monitors for each object, in the view.
- Monitor type filter - To filter the content of a NOC view by monitor types, select a monitor type from the list and click the Select button. To remove a monitor type, select it and click the Remove button. Notice that the overall status of the NOC view and its content are affected if you filter by monitor types. For example, if a custom NOC view is created containing a monitor type filter of
CPU utilization,Disk utilizationandMemory utilization, only those type of monitors are listed in the NOC view.
To save the NOC view, click the Save button.
Note: Up to 32 customized NOC views can be created.
Editing an existing NOC view
To edit an existing NOC view, select it from the list and click the Edit button. When finished making changes, click the Save button to store your changes.
Deleting an existing NOC view
To delete an existing NOC view, select it from the list and click the Delete button.
Topic 8738: Send Feedback. Download a PDF of this online book from the first topic in the table of contents. Print this topic.