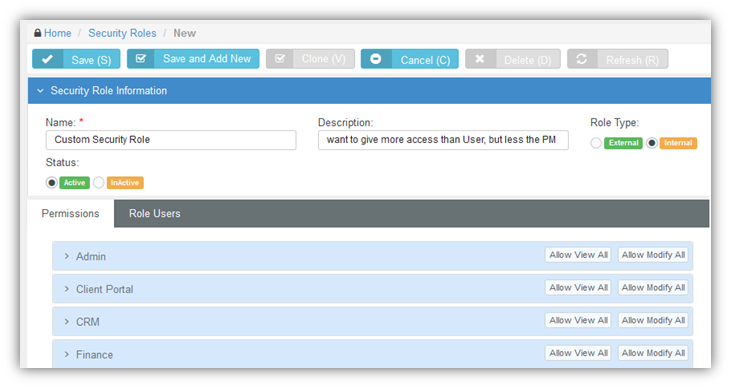
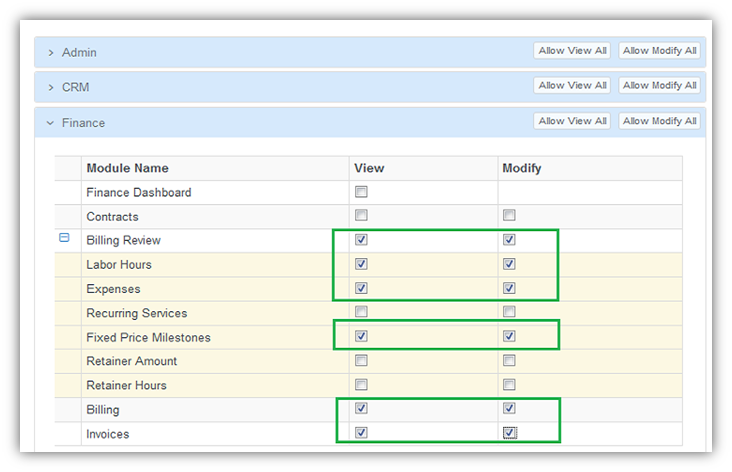
The Roles page determine the access an employee has to different modules, menus and selected settings. The system provides several predefined security roles for both internal and external users. You can also add custom security roles. A person assigned multiple security roles has access to the combined privileges of all assigned roles. Certain permission categories include special features.
Pre-Defined Security Roles
Administrator, Project Manager, CRM Manager, Finance Manager, Service Desk Manager, and User. External User and External Manager. These are used by clients using Client Portal.Pre-Defined |
Description |
Administrator |
The highest level of permissions. Complete access to add/edit/delete, and configure any record across the system. |
Project Manager |
Access to Project Management modules and related reports. Add/edit/delete projects, clients, approval routes, and employees. Also, adjust/approve time and expense-sheets. |
CRM Manager |
Access to CRM modules and related reports. Add/edit/delete customer contacts, opportunities, activities, and customer quotes. |
Finance Manager |
Access to Finance modules and related reports. View/update/process billing, invoicing, receivables, account setups, and payments. |
Service Desk Manager |
Access to Service Desk module and related reports. Add/edit/delete service desk settings in Admin module. Create workflow rules, etc. |
User |
Access restricted to personal information, time and expense sheet entries, and time-off requests. |
Special Features
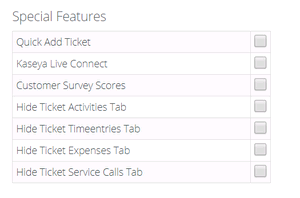
You can enable special features for certain categories of permissions.
Quick Tickets
Security roles have a Client Portal option called Quick Tickets. When checked in a security role, customers are presented with a simplified page layout when adding new tickets. If unchecked, customers are presented with the same page layout that employees see.
Adding Security Roles
Internal - This security role can only be assigned to employees and not to CRM customer account Contacts given client portal access.External - This security role can be assigned to both employees and to CRM customer account Contacts given client portal access.Active or InActive

example of special features:
